Started: March 1st, 2022Completed: April 25, 2022
Total Cost: ~$250

Wow it sure has been awhile...
Hey look another reason to use this blog. Welcome to another (tutorial???) This time a progress thread on Sigma from Bungou Stray Dogs!!
Oh How I Wish You Were In Color....(Materials and References)
If you're reading this past January of 2023 you might have references to use for Sigma from season four of the anime. Unfortunately I didn't have that luxury orz. I had 3 officially colored photos of him to go off of and one fanart that had colors I liked. Here are the 2 main references I used: 


One for color and the other for design. I'm not gonna go too into detail about my references because, like I said, I'm sure there will be better ones available for him soon. Just keep in mind I was going off of very little in terms of color and placement.
Next up, materials.
Fabrics/Sewing Supplies:
I unfortunately do not have a ton of notes on how much all the individual fabrics cost me but I do know in total I spent $136.53. All the fabric I got for this cosplay was bought at Mill End in Portland, OR. - Butterick Pattern B6868, Simplicity Pattern 8427
- Champagne charmeuse fabric ~6 yards (for the coat, I highly recommend you don't buy this)
- White cotton reyon blend fabric ~2 yards (for undershirt)
- Black cotton fabric ~0.5 yards (for the black details on the sleeves)
- 70 denier fabric in dark purple ~4 yards (for the lining, I highly recommend you don't buy this)
- Purple organza ~2.5 yards (also for the lining, I highly recommend you don't buy this)
- ~2,000 rhinestones in iridescent and gold (from a few places, I recommend Amazon)
- E6000 Fabri Fuse 2oz hanging bottle
- Matte brown fabric paint by tulip
- Black + brown fabric pens
- 2 square buttons (these are harder to find than you think)
- 4 yards of bias tape binding in white
Other Pieces (Not Sewn):
- Black pants, thrifted $0
- Knit undershirt (the one I have pictures of is dark grey, I've since changed it to a dark purple one)
- White tie
- Kitten heels
- Clip on earing backs + the charms used for the spire earrings
- Wig: Two (2) Epiccosplay Persephone wigs. One in ice purple and one in silver grey. $87.
Wig Details!
As stated above, I used two wigs and spliced them together to create Sigmas split hair style. In my excitement to cosplay them I did not do a ton of research into other alternatives because I wanted to be able to create the zig-zag style on top of the wig and I didn't see any pre-made wigs doing that. I know that as of right now (Summer 2022) there are a handful of sigma wigs available on aliexpress. If you're intimidated by wig splicing, don't be! It was my first time doing it and it wasn't bad at all (as long as you are okay with dropping almost $90 on one wig). You can get your wigs from anywhere as long as you get two in the same style!

Forgive me I am going to try and attempt to explain this as best as I can. Splicing together a wig is simple enough, please refer to this very helpful video for a visual.
The mess you see in the picture above is a little more difficult. To get the zig zag on top I used the glued hairline method of cutting out wefts, solidifying the ends with tacky glue, cutting them to a point, and then hot gluing them on top of the wig.
The glued hairline method can be better understood in this video. I did the exact same thing except instead of gluing to the hairline I glued it to the top.
When you splice your wig together the most difficult part will be where the netting becomes a skin top. I actually glued the top pieces of my wig together instead of sewing it and then used the zig zag wefts to hide the glue mess because it was a bit easier. The bobby pins you see in the above photo was just to hold the pieces in place while they were drying. It looked a little wonky on the wig head but once I actually had it on it looked pretty good.

As for cutting it, if you've never done a straight cut like this before it is important to note that you DO NOT actually cut it straight across. You have to do the upwards cutting and then go in and slowly build the solid straight line cut. I also recommend thinning out the ends to help with the look. It's tedious as hell.
After cutting what I refer to as "the back shelf" the wig became super thin. Thankfully, I had two left over halves of wigs to use to thicken up the back. The picture above shows me sewing those in. For $87 I'm using all that I can okay.
Sorry there aren't many pictures to explain the wig but it was a messy time and holding my phone with glue on my hands was not ideal. It took a bit of imagination, but it overall wasn't too difficult. For context this was my first time doing anything like this to a wig and I think it turned out okay! So don't be intimidated.
The Jacket...Vest....Thing....
Forewarning: If you don't possess some jargon and knowhow of sewing this is going to be confusing. I found this project to be relatively easy but I've also been making cosplays for 10 years. In no way would I recommend this project for a beginner. I'd rank it as lower intermediate. There is a lot of editing that needs to be done and if you don't know a lot about how to read patterns I'd say study up on that and maybe try a few out before coming over to this. There are other ways of understanding how to make this cosplay, some that might make more sense to you, but this is the only way that made sense to me.
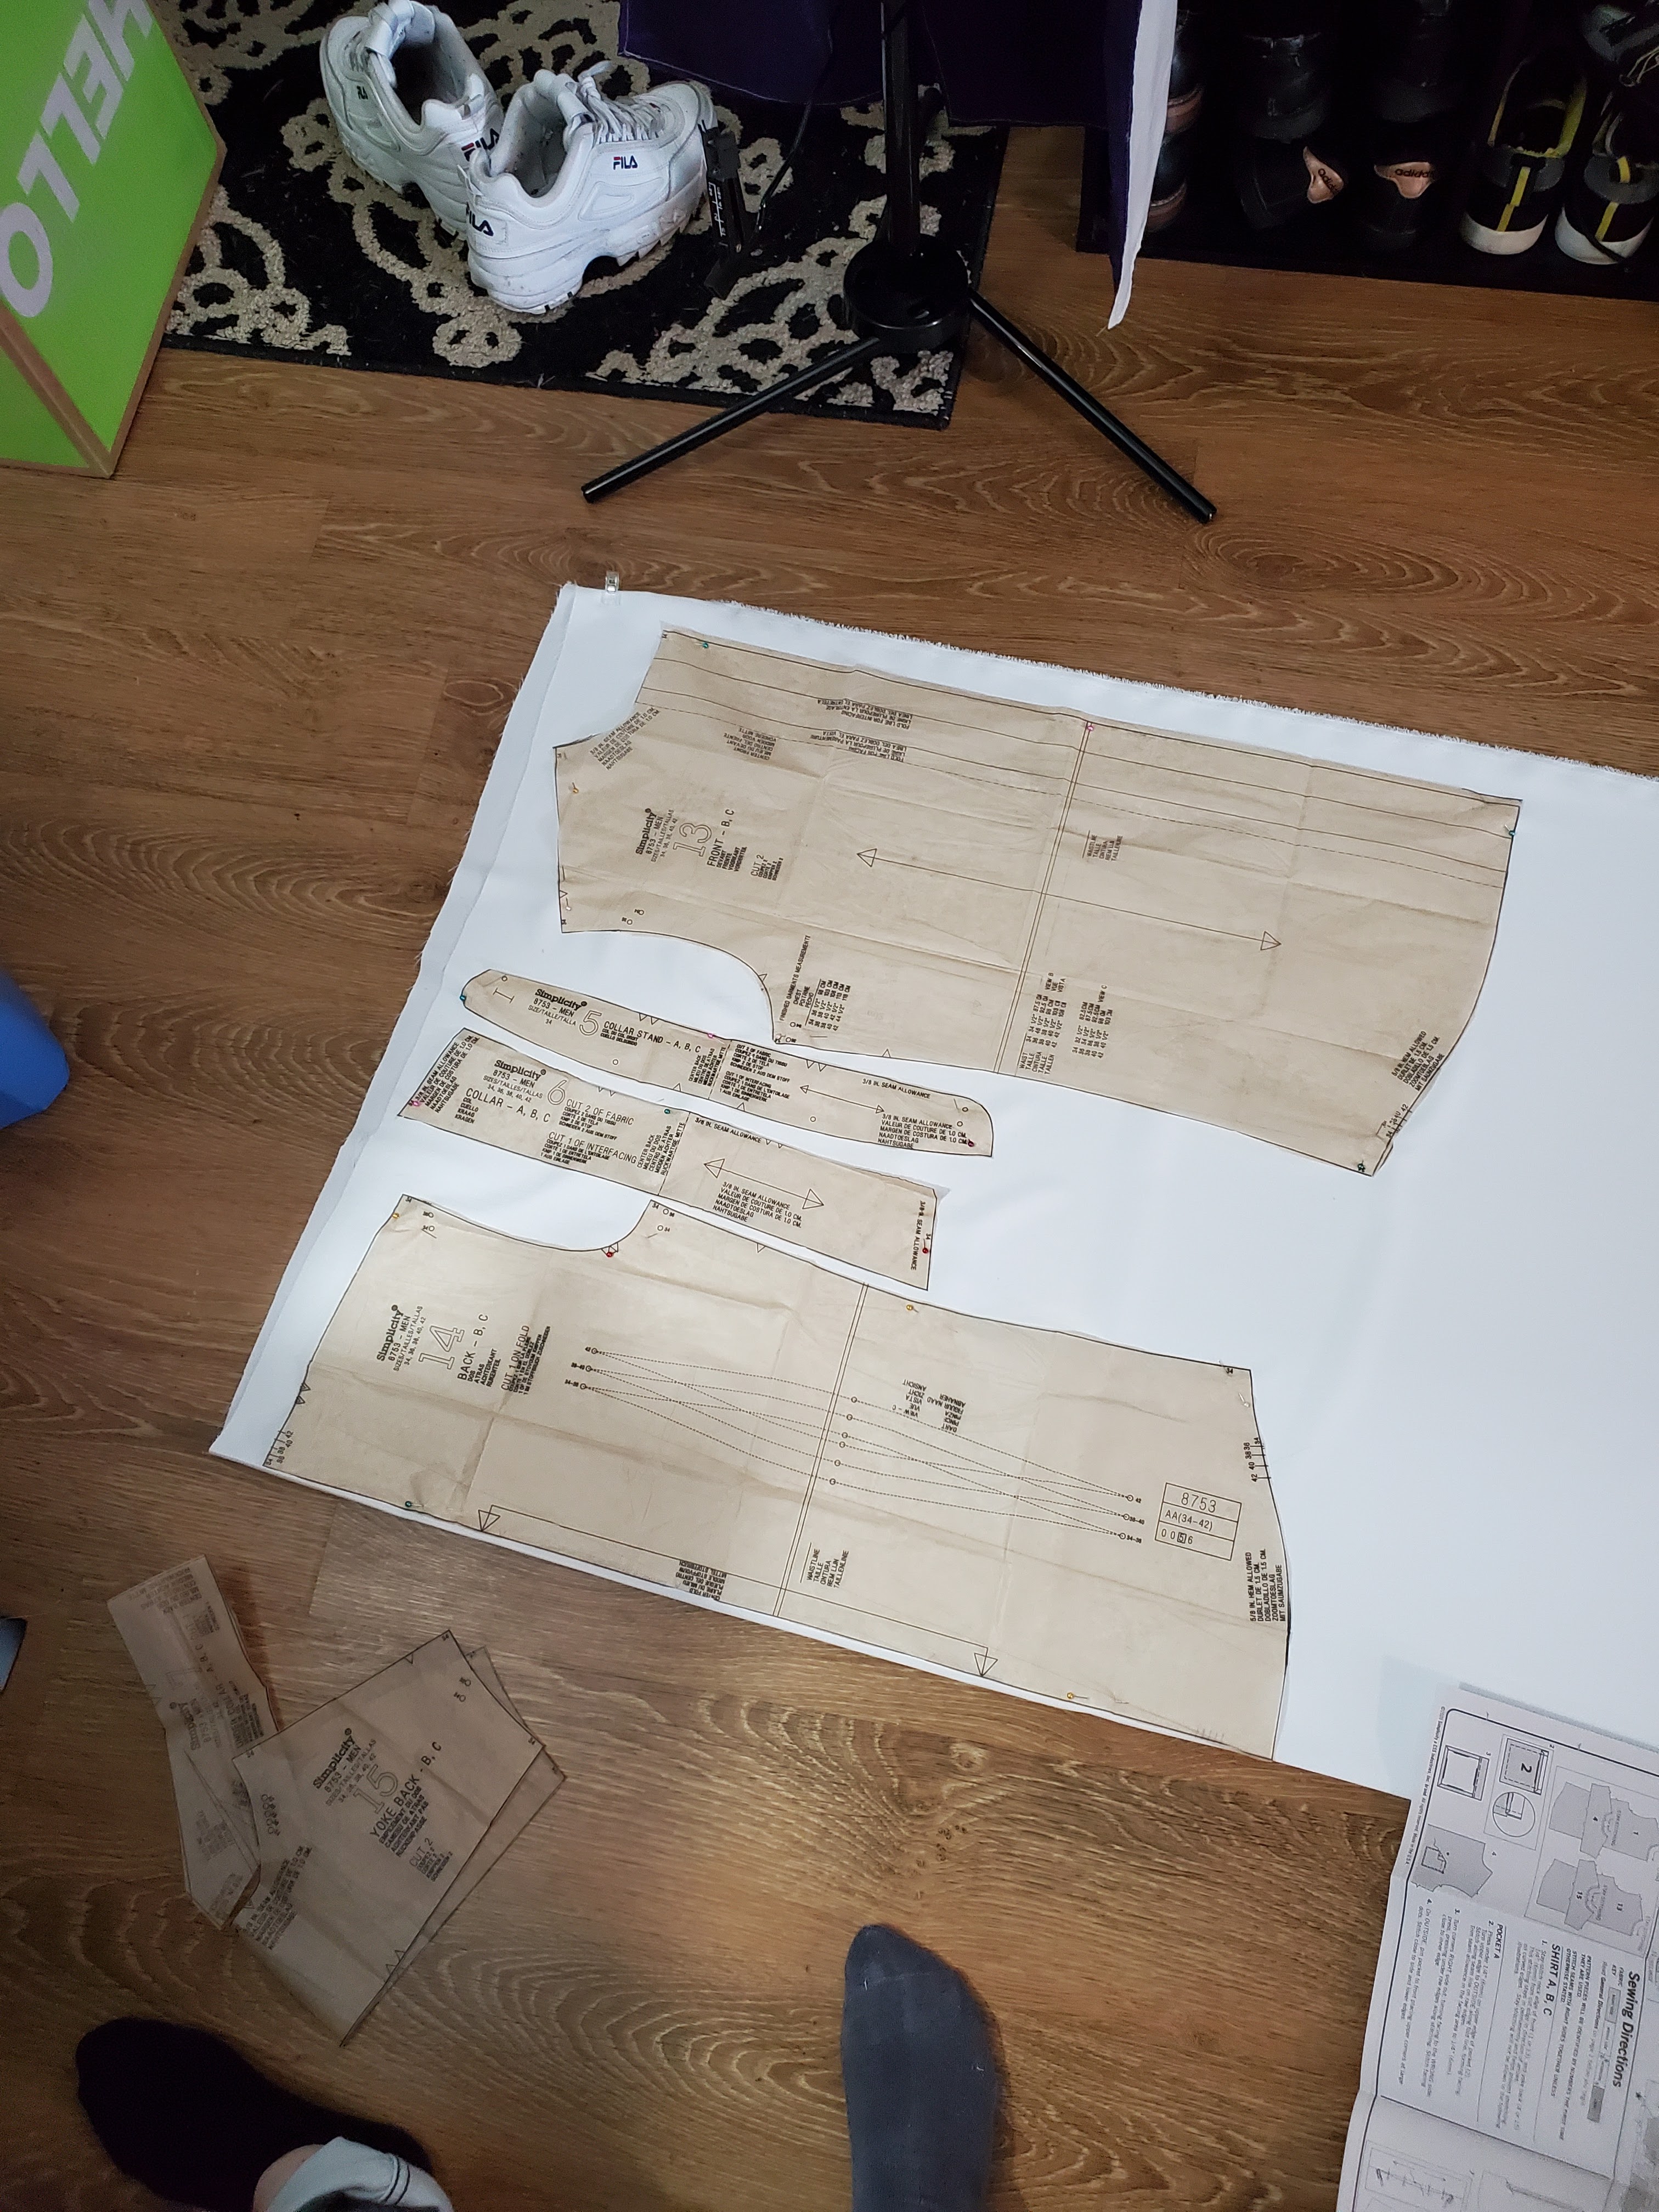
Allow me to present Butterick B6868

This pattern comes with the jacket (A) as well as a dress (B). of course for this cosplay I only used the A pattern. This pattern was ideal for me because it had the lapels in the shape that I wanted them and it also has princess seams! I was really picky because a detail on Sigma is the dart on his jacket does go up to the breast, giving a more curvy appearance to the jacket/vest/thing overall. I hate darts so a princess seam was more ideal for me. And, because of the princess seams, it makes it very easy to stack the jacket! Another amazing thing about this pattern is it comes in plus sizes!


Referring back to my notes in the materials section, I noted how I wouldn't recommend a lot of my fabric choices. To clarify, I think that this cosplay could be made just as well with different fabric. The choices I picked were overly expensive and difficult to work with. It was my first time using charmeuse and don't even remember why I picked it. I think I just liked the color. In hindsight, I could have found something better and easier to work with for less.
Small Edit #2: Double Lining
I'm gonna jump ahead here to explain something else of note:

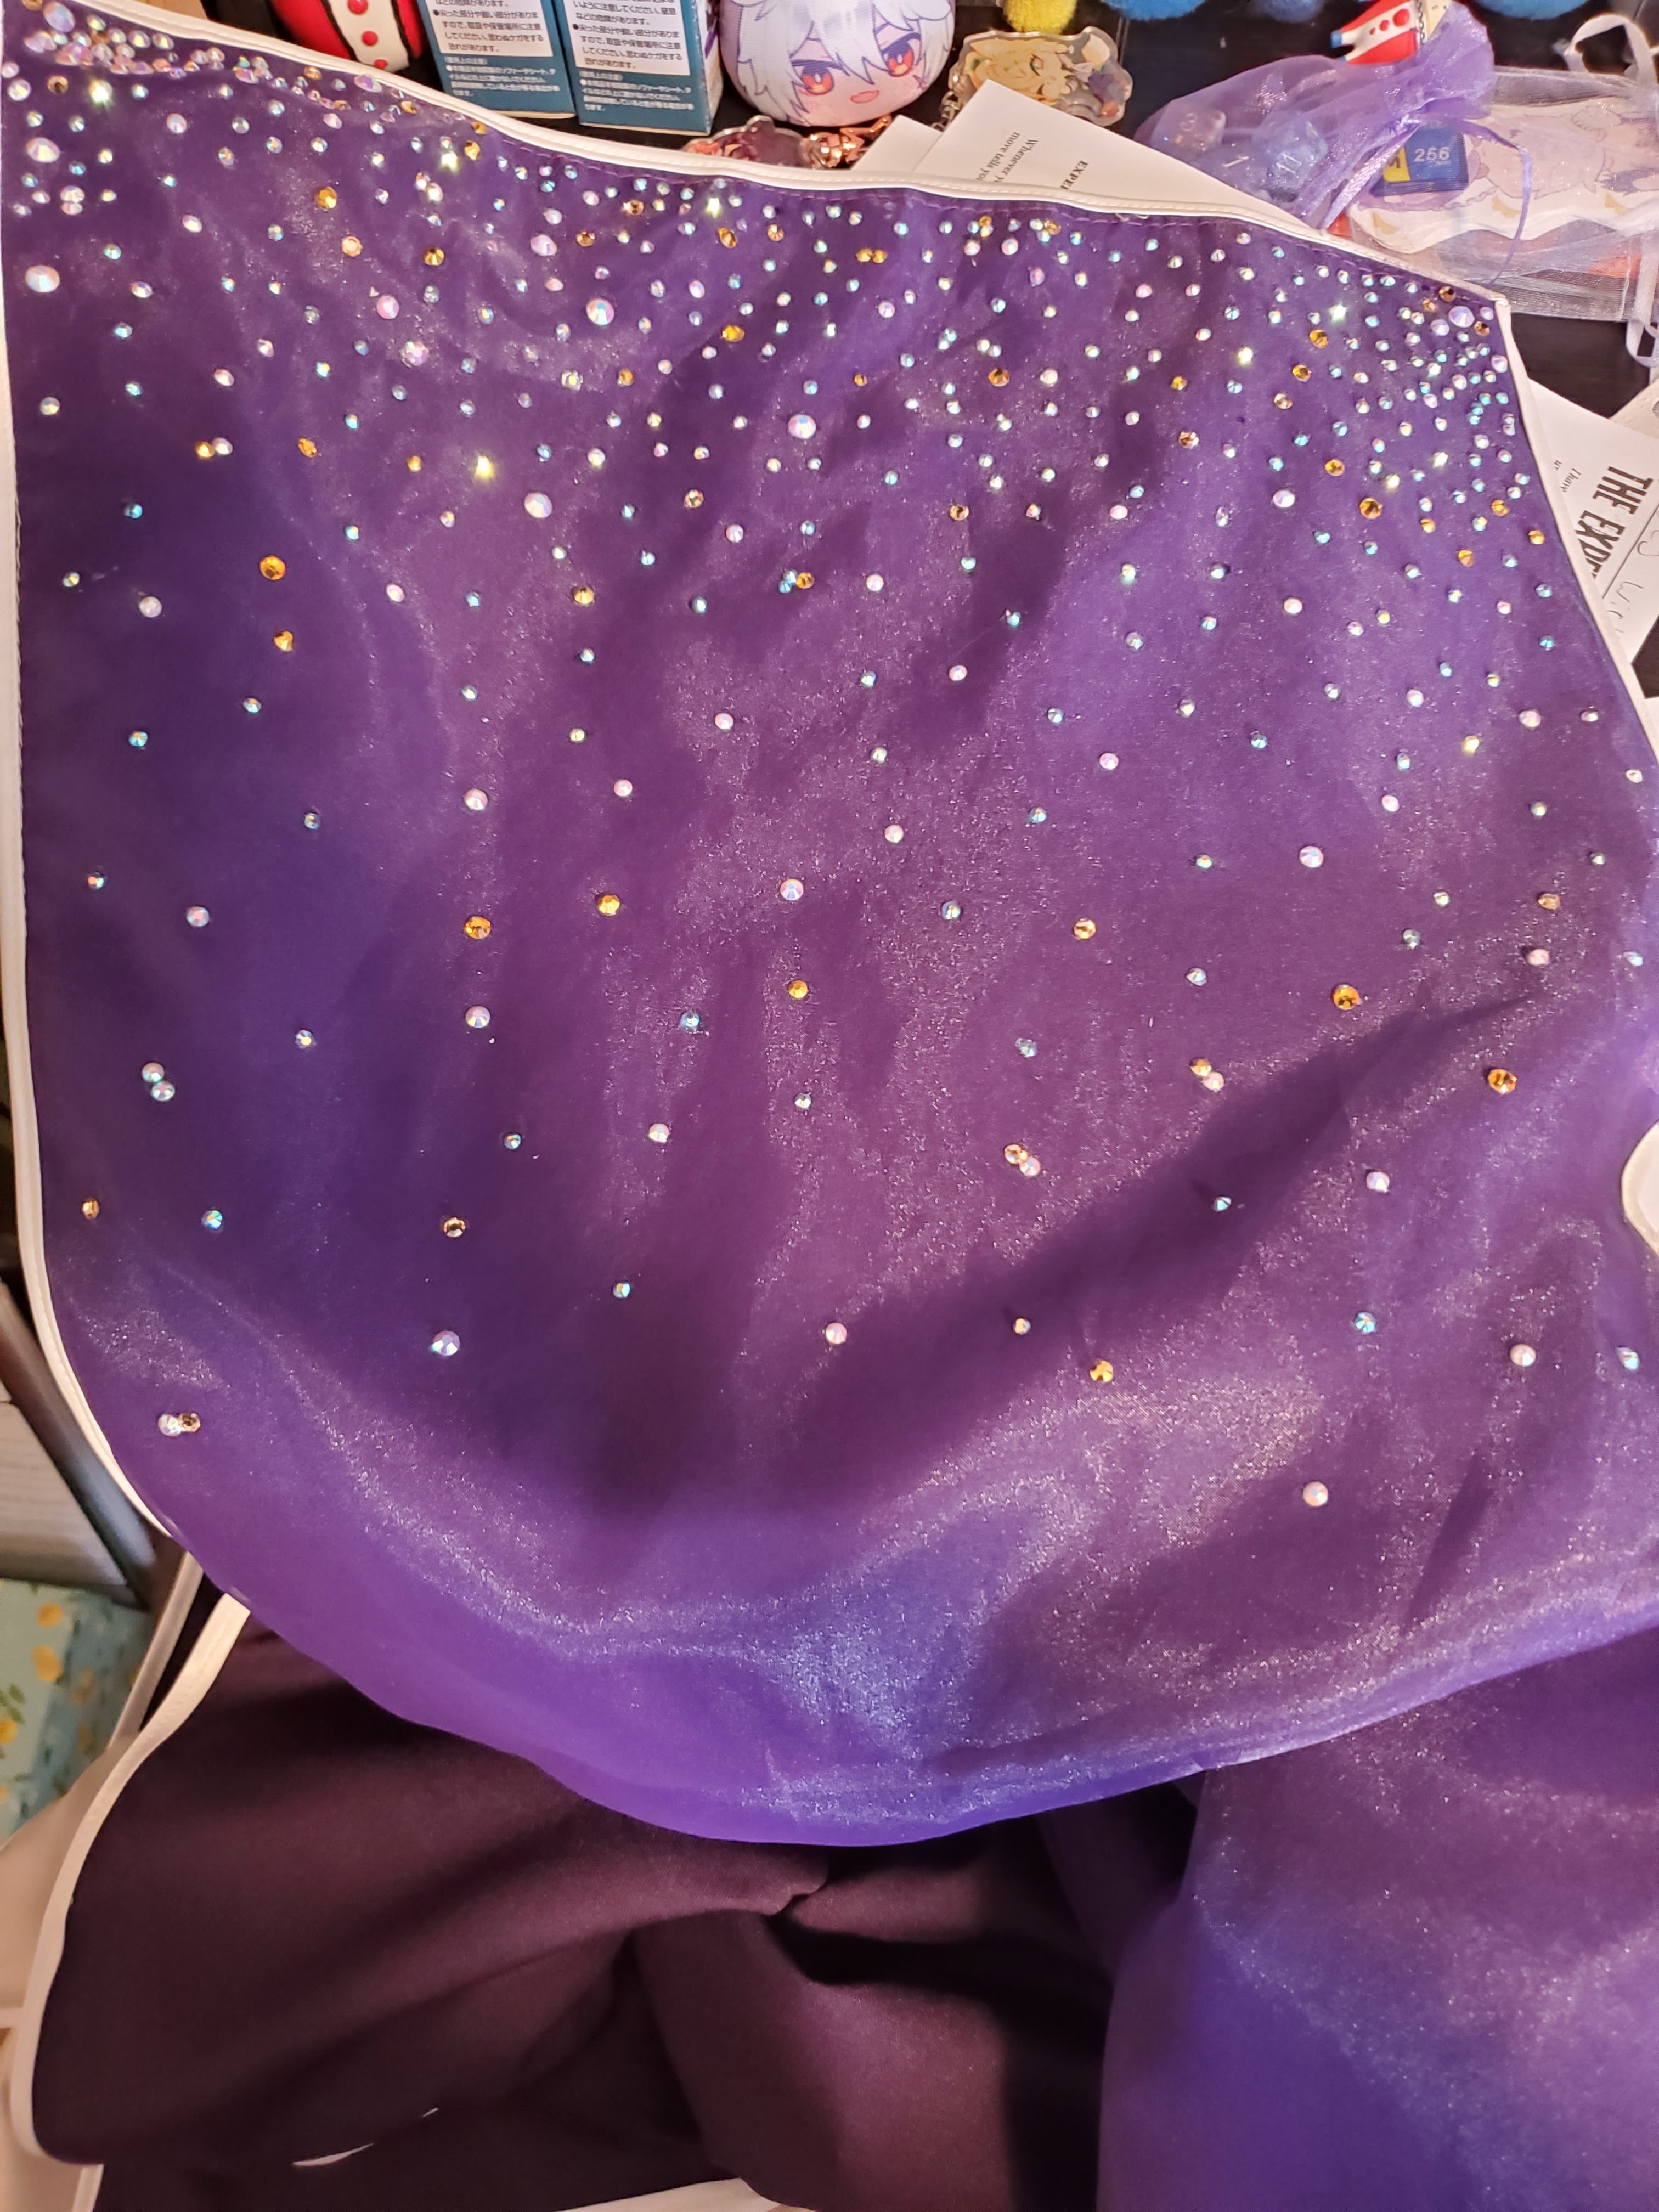
Ignore the rhinestones for a moment (we aren't there yet) but this is the best picture I have to show my 2 lining layers. I used champagne colored fabric for the top, dark purple for the lining, and then also purple organza in the lining. The purple organza is only in the back part. Saves me money and time from having to sew it everywhere else. I did the organza because a) looks a bit more sparkly like in the manga and b) gives the rhinestones something more to cling to. Of note, organza is known to be hard to iron which is why I wouldn't recommend it.
I was originally going to go with that glitter tulle you can find in the costume fabric sections of any fabric store, but I decided against that when I saw how much the sparkles shed off of it. Unless you want your entire cosplay and anything else that comes into contact with that cosplay to leave with sparkles, I'd recommend not doing that.
Small Edit #3: No Sleeves:
I apologize I will explain this as well as I can. For the most part you can follow the Butterick pattern directions for all your pieces and needs, but one problem you'll run into is the no sleeves. The reason I call it a jacket/vest/thing is because its easier to think of it as a really long vest in terms of sewing it. If you've never sewn a vest before, this video might help visualize how you sew the side seams.
Basically, you have leave the side seams open so you can sew the sleeves area together first. Otherwise you'll end up having to sew two wrong sides together if you listen to the directions. (This goes back to how I wouldn't recommend this project for beginners).
Small Edit #4: Keyhole Back


Calling attention to this because you can't see it in my reference images above, but there are panels of the manga where you can clearly see this keyhole peice in the back of the jacket. I might be insane but I have always done back slits by sewing everything by the books, sewing the lining in, and then cutting the peice out of both the top and the lining in one swift motion. Sigma just has a lot of stupid bits like this.
Small Edit #5: Painting the Lapel


A little bit less than straightforward, the lapel gave me a lot of trouble. First off, the piece labeled UNDERCOLLAR on the pattern is the part that will show on top. So it's the one you need to put the brown lines on. I accidentally painted the wrong side the first time. It's difficult to judge where the lines go so I recommend basting a mockup together and then marking the lines once you see how it'll look when its sewn.
Of note: The pattern will say you need two pieces of interfacing, I don't think you do. I made the lapel a total of 3 times and I liked it best with only one interfacing peice on the inside.
I used fabric paint for the larger lines and the brown fabric pen for the smaller middle line. I have a silhouette cameo but I guess I'm determined to never use it. I really recommend the fabric pen it shocked me on how well it worked! It was only like $1.30 at JoAnn's too. If I were to remake this I would have used the pen for all the lines!
Small Edit #6: Pocket Square

Don't look to closely at this part lol. Admittedly, I forgot that Sigma had this until I was completely done with the cosplay. So I tried to sew it in delicately around the rhinestones. I originally wanted to buy a pocket square because I thought that might be fun but boy are they expensive! Since I had already spent so much money on this cosplay I decided not to and fashioned my own out of a bit of left over white satin. Look up "how to fold a pocket square" to learn how to get the shape. I ironed it and sewed it before top stitching it in so it would maintain the shape even in the fake pocket!
Big Edits: Bias That Tape


So, not that you've essentially cut your jacket into a vest you'll have to finish the edges somehow. One option is to hem it, which I think is a fine option. Or you can be insane and sew bias tape around the whole thing. Its really small but it does appear from the first reference photo I showed that Sigma has a white bias binding around the entire jacket/vest/thing. So, I did that.
It's simple enough, just baste your lining to your top around the entire jacket, go over the raw edge with fray check (just in case you find loose stray strings) and then use bias tape to cover the raw edges. I'm not saying its perfect, I'm not saying it always looks good. But that's what the rhinestones are for lol.
If you're new to bias tape you'll have to do some sweet mitered folds on the outer edges, and some sobbing on the inner corners. It's not easy to make it look clean, but sometimes sewing doesn't look clean. Just remember you're not making a drawing and when you're transferring something to real life sometimes it looks a bit wonky. The bias tape will smooth out your squares a bit and make the cascades not look so harsh. I did have to hand sew some of the inner corners in because my machine just couldn't reach in there.
Of note! I have never once touched the tension setting on my sewing machine but I really should have. The weird crinkle in the fabric you see around the bias tape is because my tension was way too high. Please make sure you're checking the tension setting especially with the princess seams, bias tape, and basting!

Add your buttons and button holes wherever you see fit and then the hardest part is over! I'll talk a bit about the undershirt and then the rhinestones!
The Hardest Part is Over, Now for the Shirt....

For the undershirt I used Simplicity 8427. I highly recommend the Mimi G patterns because almost every single one comes with a sew along! So if you're ever confused you have a video of someone making it to help you.

To get the lines on the collar I used a fabric pen again, this time in black. It was really easy to get these super small lines! All you need is a ruler and a steady hand.

On this pattern the only thing you'll have to edit is the sleeves. The bell shape is simple to trace out, just make the sleeve flare once it gets to where you can approximate the elbow to land. If you need a pattern, the Butterick pattern above has one for the dress B! If your fabric is flowy like mine its very forgiving. I did a double hem at the end of the sleeves to cover the raw edge because I didn't feel like doing a lining.

For the black parts I used simple black cotton fabric. The part on the shoulder is ~8 inches of black fabric to replace the white and then sewn in. The circular part above the elbow isn't sewn in at all, I just safety pin it to the shirt. Hey, sometimes the best solutions are the most simple.
And, Finally, Get STONED
.jpg)
You will need this stuff, trust me when I say its amazing. e6000 fabri fuse in a 2oz squeezer bottle saved my life. Don't worry its not toxic like normal e6000. One drop of this and you're rhinestones are pretty much cemented on! If you're intimidated by rhinestones, trust me when I say its actually not that bad. It's pretty easy and fun.

If you're gonna go the rhinestones route you'll need a lot more than you think. I originally thought 350 would be enough but ended up with around 2,000 of them on there. It's a tedious process, don't get me wrong, but it wasn't as bad as I thought. I went a bit overboard on them and placed them everywhere I thought would be cute. Also I couldn't imagine needing them in the near future so I just decided to use them all on Sigma. Tweezers help but I also just used my fingers a bunch.
I have since thrown this cosplay in the washing machine on a gentle cold cycle and only about 40 rhinestones came off. Normally I would only hand wash this kind of cosplay but my cat pee'd on it and well...getting the smell out was the most important thing. It was annoying to pick the rhinestones out of the barrel though.

Final Notes...
- To echo what I said in the picture, its a difficult outfit to make because it has weird shapes and odd details. I encourage everyone to get creative with how they make it!
- If I could do it over, I would change the fabric and then go a size down on the pattern. I forgot that this is a jacket pattern so it fits me like a jacket, a little bit big and not exactly form fitting. Normally I would just safety pin it or take it in on the sides but alas with how I measured everything that's not feasible
When I wore him to Sakuracon 2022, not many people recognized me but a lot of Seattle folk loved the cosplay! I think my favorite interaction was getting coffee as him on Saturday morning and the person at the stand gushing over the rhinestones. My mom has also told me this is her favorite cosplay I have lol. He was an adventure to make and I would never do it again! God speed to the rest of you.
Comments
Post a Comment